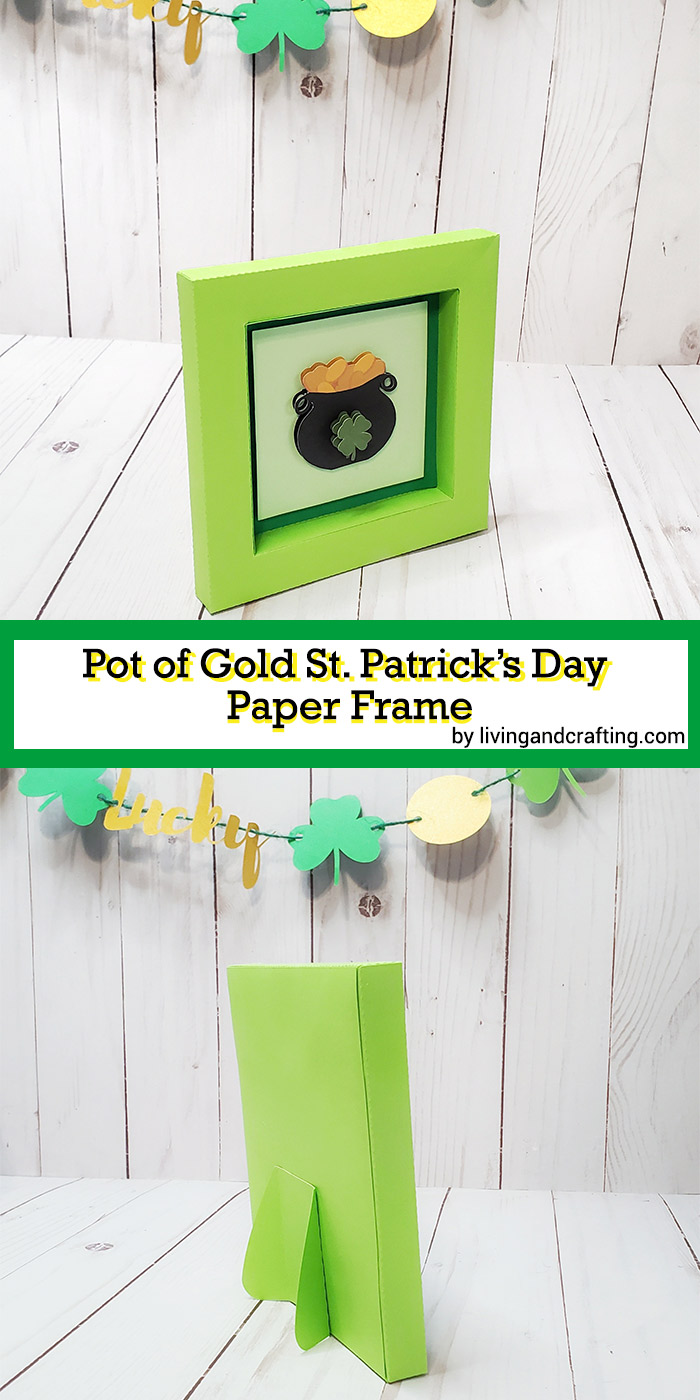
Every March 17, St. Patrick’s Day is celebrated, an Irish celebration that has spread throughout the world, despite being a Catholic celebration it has taken different ambassadors through the years, one of them is the Irish fairy figure leprechaun who is characterized by taking care of his treasure (in some cases a pot of gold) and at this time is used in this celebration to decorate products and the celebration’s place. On this occasion, I have for you a St. Patrick’s Day Paper Frame to decorate a place in your home or workspace if you want to commemorate this date.
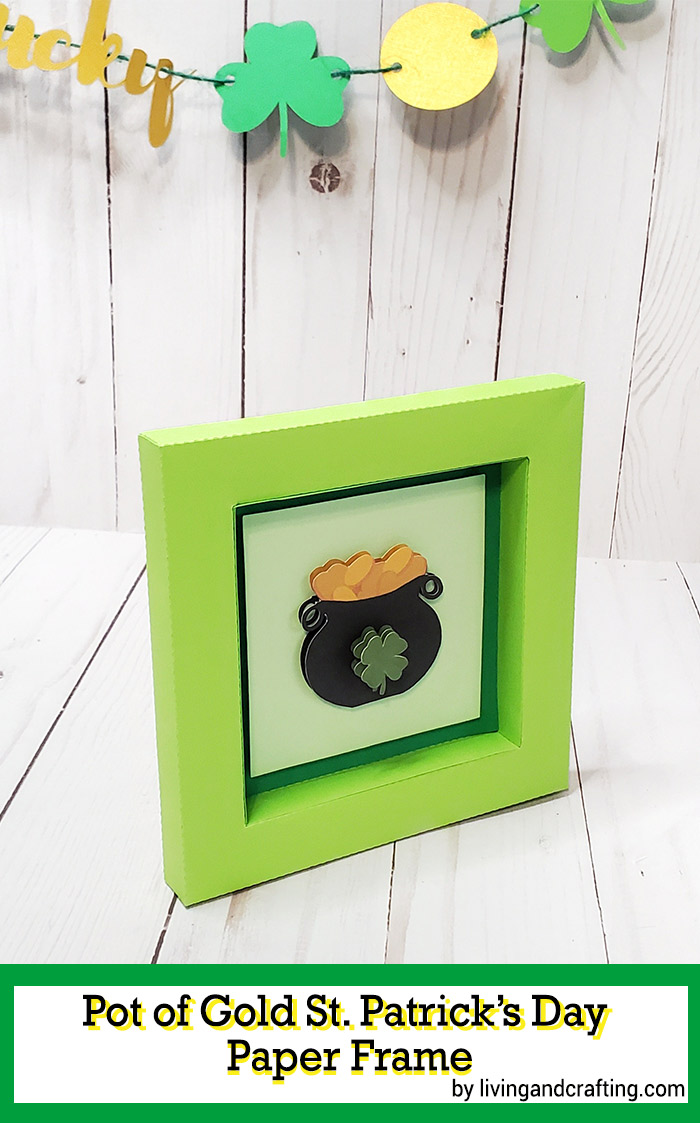
St. Patrick’s Day Pot of Gold Paper Frame
This Saint Patrick’s Day pot of gold paper frame can be made with the files included in this post or you can decorate it with any other image or element you want.
What you need to create this St. Patrick’s Day Paper Frame:
Template files for the frame and decoration download here
Note: To create this template I have used as a reference the Passepartout template from www.templatemaker.nl, I modified its template to accommodate my needs.
3 cardstock of different shades of green.
Glue, double-sided tape.
Scissors, xacto knife, or cutting plotter machine.
Printer.
Step by Step to make St. Patrick’s Day Paper Frame:
If you have a cutting plotter machine:
Cut the files with the pieces to assemble the frame
If you don’t have a cutting plotter machine:
Print the .pdf file with the frame template and cut the solid lines with scissors or xacto knife.
The next step is to print the file with the images to decorate and cut them by the edge.
Once we have all the pieces cut it is time to assemble !!
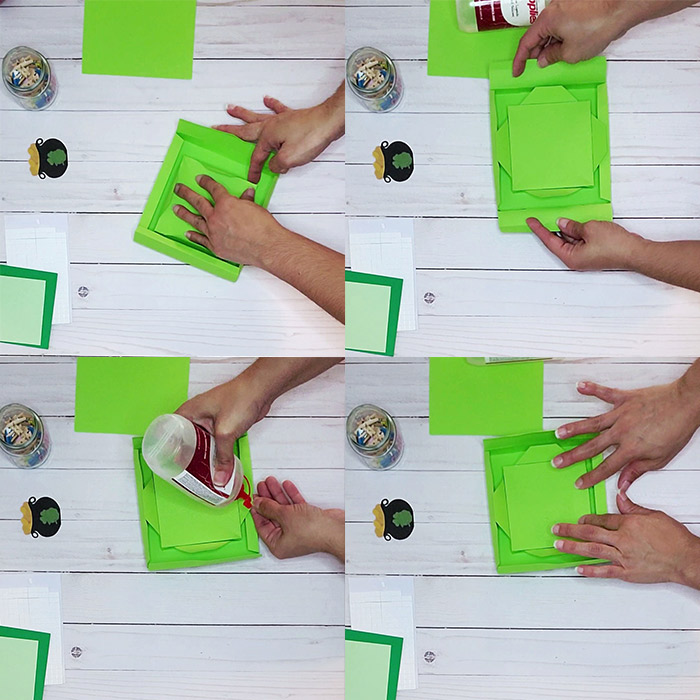
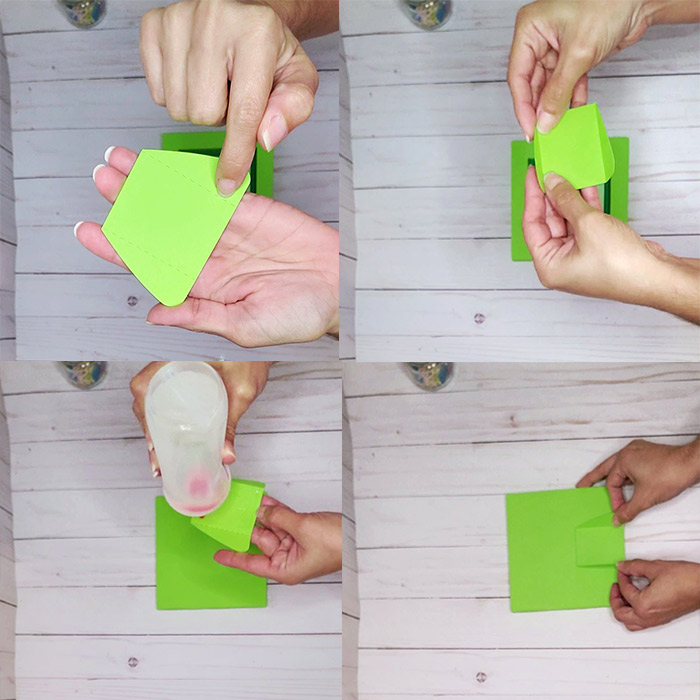
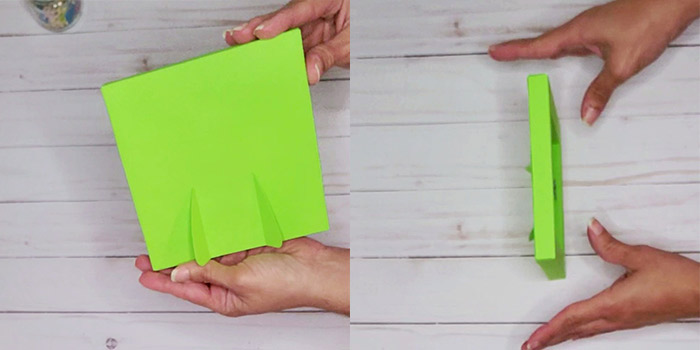
First, take the largest piece you cut for the frame and fold each stitched line as the pictures show.
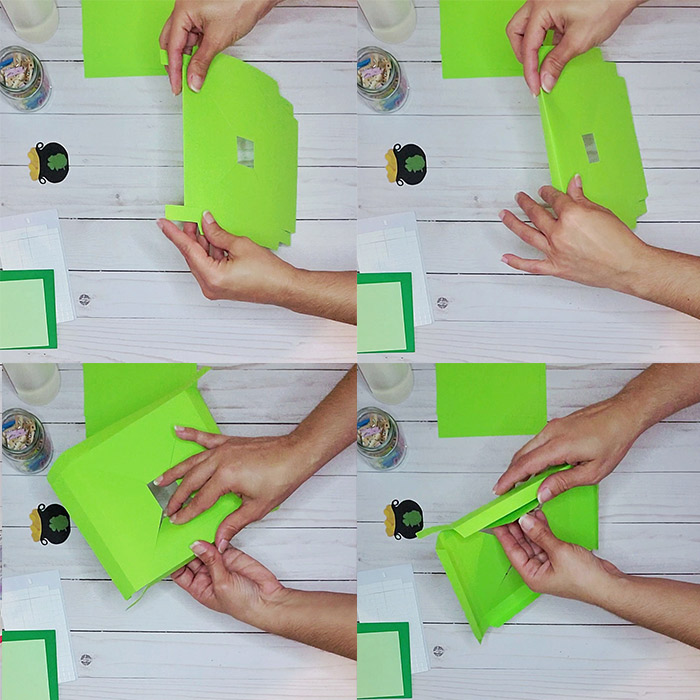
When you have folded all the lines, put glue on the 4 tabs that this piece has and glue them as shown
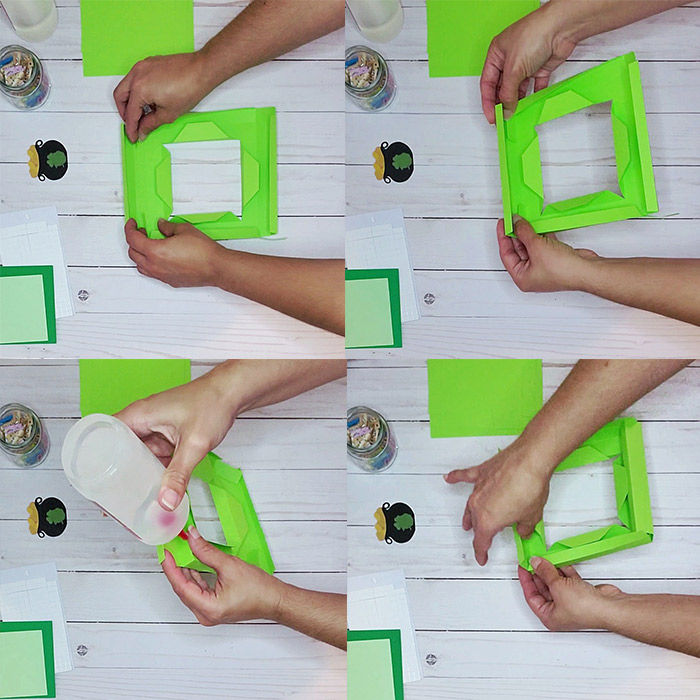
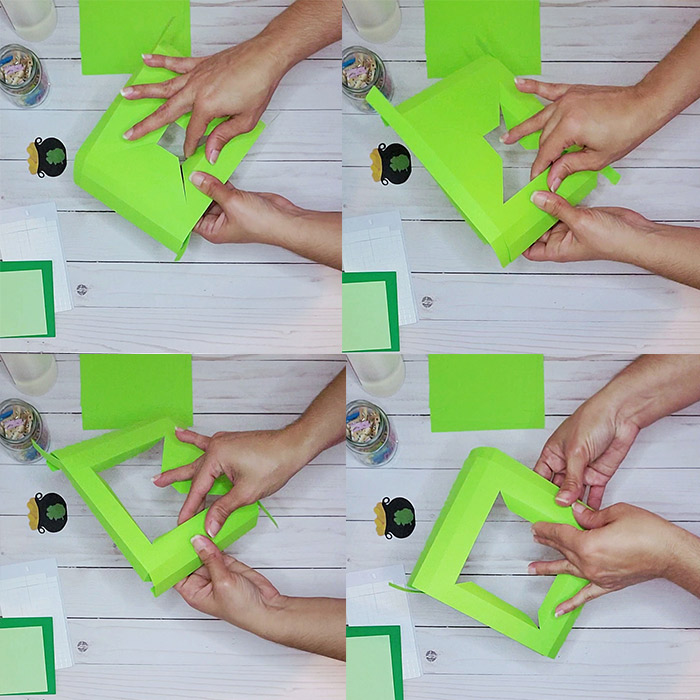
You already have half of the frame assembled, the next step is to assemble the center of the frame:
Take the other piece that has stitched lines and fold them as shown below
Once you have put glue on the tabs, glue them as shown in the photos, I used a mini clothe pin to help me with this step.
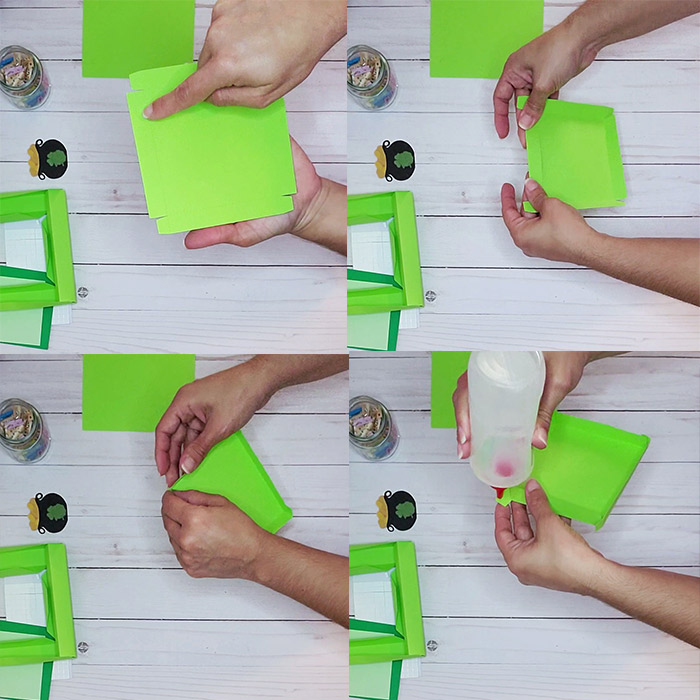
You already have the two main pieces of the frame assembled, the next step is to insert the small piece into the large one, be careful both pieces are correctly assembled; then flip the piece over and place glue on the longer tabs as the photos show:
Glue them to the side in the center of the frame and repeat steps for the remaining three sides. Then put glue in the small tabs and glue them to the center of the frame.
Put glue on the two sides with the longest tabs of the frame and glue them as shown in the photos
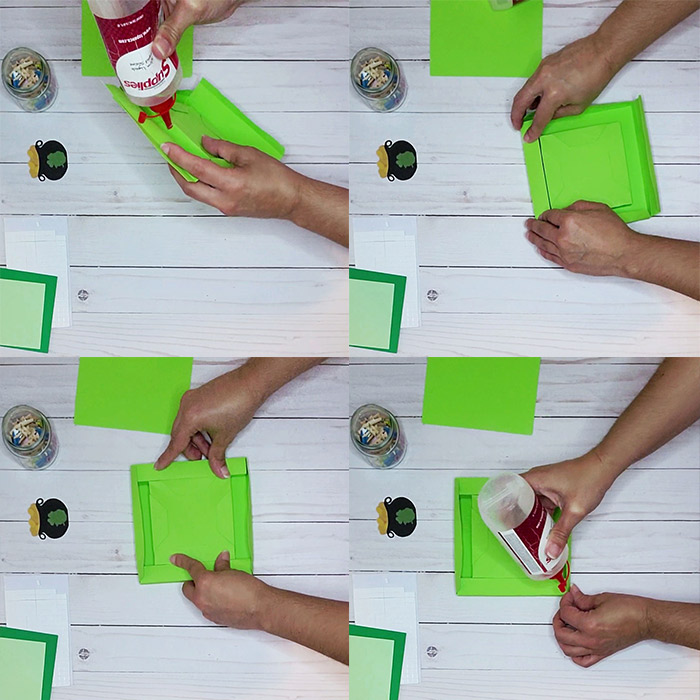
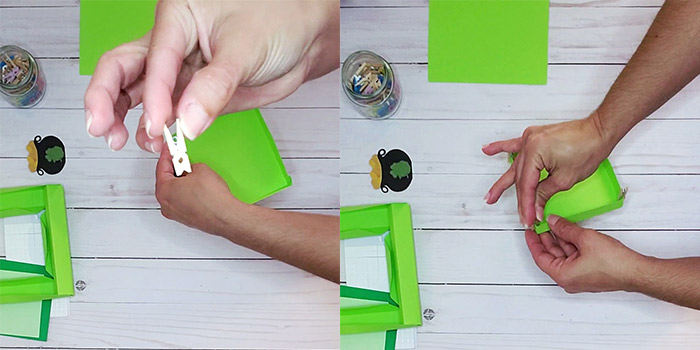
To finish with the assembly of the frame, put glue on the entire back and take the 10×10 cm square to place it on the back of the frame.
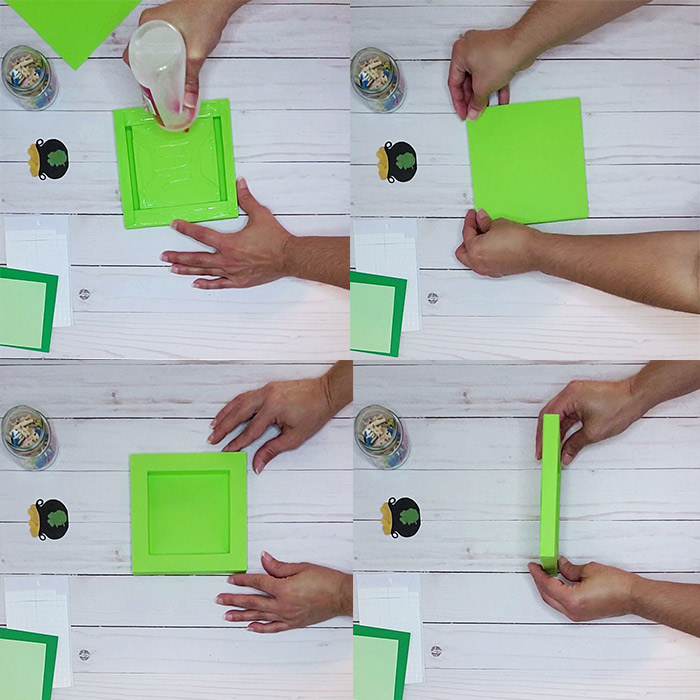
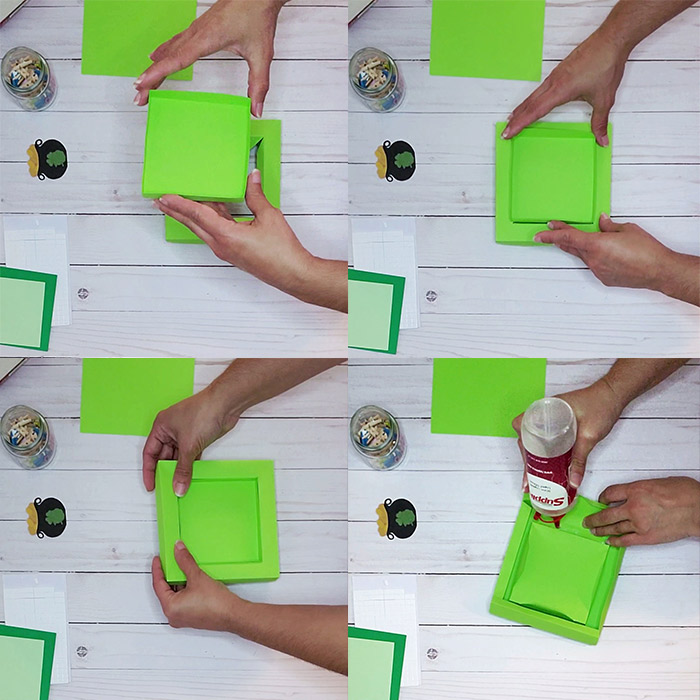
Now we are going to decorate the frame!
Take the two remaining squares and glue the largest one inside the frame
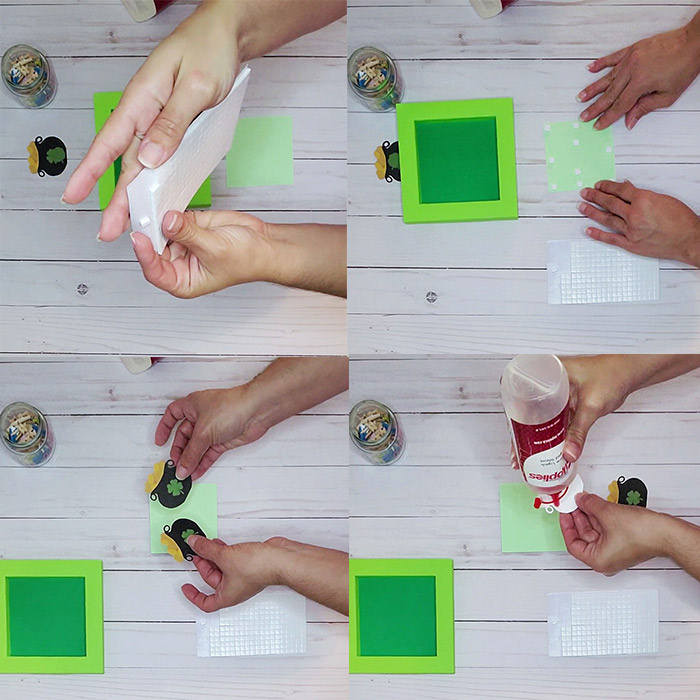
Then take the smallest square, where you are going to place the images, but first I want to tell you that you can glue it to the box in two ways:
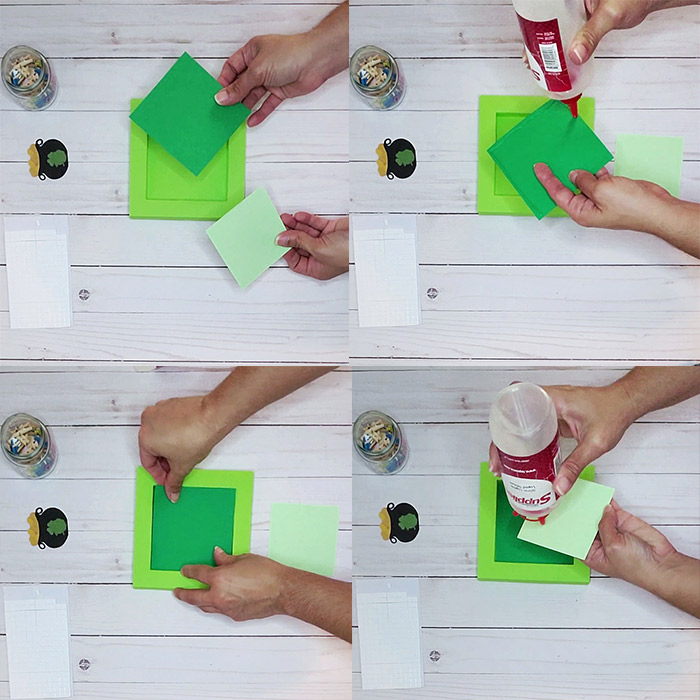
With glue as shown in the previous photo
With foam mounting tape like I did, to give it a 3D effect
Place foam mounting tape behind the entire small square, now turn it over and start decorating; take one of the pots of gold and glue it to the square
Now, take the other pot of gold and put foam mounting tape on it, to create a 3D effect, and glue it on the previous one. Then take the shamrocks and place a square of foam mounting tape and stick them one on top of the other, the result will be like the one in the photo
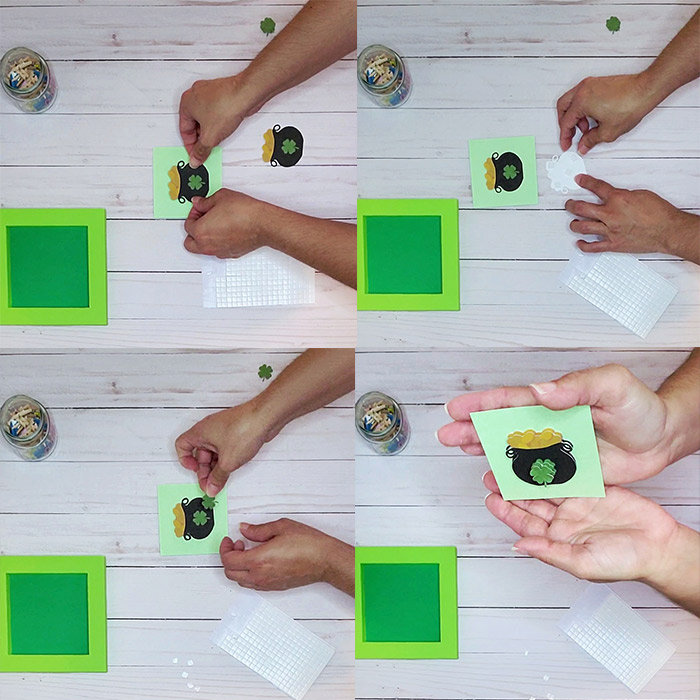
For this step, remove the layer of foam mounting tape that is behind the square and stick it in the center of the frame. You see how cute it has been!!
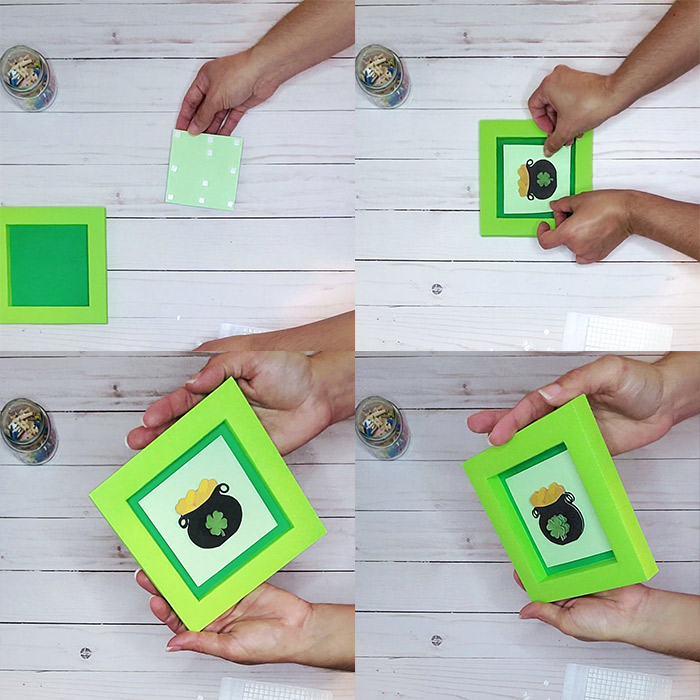
The last step is optional depending on the use you want to give it, you are going to put support on it so that it has more stability. Take the last piece that you have left and fold the stitched lines, glue it to the frame that is almost finished.
You see how beautiful your frame has been for St. Patrick’s Day, you can use it on a table or stick it to the wall!
When you make it, you can tag me on your networks (Instagram, Facebook, and Pinterest) as @livingandcraftingblog, I would love to see how you used this St. Patrick’s Day Paper Frame.
If you want to see another beautiful St. Patrick’s Frame, check out my friend Cami from The Crafting Nook for a cute one!
If you liked this post you should be interested in

Kisses,
Kari